
Training of machine learning models is fun, but it’s a useless waste of energy if you are not going to use them afterwards. Usage patterns can be very different. In some case you are creating Software-as-a-Service where you run inference on your or somebodies cloud and return customers only the results. In others - you need to have the model itself on consumer devices (e.g. mobile phones) and run inference there.
If you were training model using popular framework TensorFlow you’re covered in a sense that there are number of options you can stick to. To name just a few: inference with Tensorflow from Python, C++ inference with native library (TensorFlow is written in C++ after all), C++ inference with Tensorflow Lite (inference on mobile phones and/or Raspberry Pi) with bindings to Java&co, TensorFlow Serving (production-quality C++ HTTP server for inference using TF native library).
When running on a server you can use whatever is more convenient so in this article I’m mostly concerned about second use-case where you need to run inference on consumer devices.
Let’s see which options do we have. Actually there’re not so many of these: TensorFlow native library (C++), TensorFlow Lite native library (C++) and third-party solutions (like project Tract from company Snips, written in Rust). Original TensorFlow library compiled for Release on my computer weights 30MB. Imagine you need to deploy it along with your 100MB model and you have 30% overhead which might be even worse if you have a smaller model. TensorFlow Lite supports a subset of operations you can use and it’s compilation is fine-tuned for Android projects. Nevertheless it’s quite possible to compile it for desktop and it’s size in Release was about 3MB. This is already much better but the problem is that most probably you’re not even using half of the features of TensorFlow Computation Graph that the library provides.
What is left for us is to write such inference on our own. It’s not as hard as it sounds and definitely much more fun!
Step 1. Export from Python
Originally TensorFlow exports a model into a ProtoBuf-serialized (and optionally - compressed) file with all tensors and operations represented as Graph nodes and edges. If you’re training a feedforward neural network, it is a linear model: next layer’s input is an ouput of previous layer. For linear model’s inference you do not need a graph: in the simplest cases you only need weighs and biases of each layer. So we can do exactly this: export all weights and biases from your TensorFlow model:
loaded_graph = tf.Graph()

with tf.Session(graph=loaded_graph) as sess:
    loader = tf.train.import_meta_graph(meta_file_path)
    loader.restore(sess, path)
    all_layers = tf.get_collection(tf.GraphKeys.TRAINABLE_VARIABLES)

    for layer in all_layers:
        print('Saving layer: {0}\n'.format(layer.name))
        array = layer.eval()

        # filesystems do not like files with colons inside
        layer_file = layer.name.replace(':', '_') + '.npz'

        with open(layer_file, 'wb') as file:
            numpy.savez(file, array)
This will convert tensors to NumPy arrays and use NumPy’s feature to save NDarray as zip archive with an extension .npz.
Step 2. Import in C++
It’s relatively easy to import these arrays to C++. You can use cnpy library that you can just include as 1 header and 1 cpp file in your project. It allows you to read shape of the array and it’s data.
#include <cnpy/cnpy.h>

auto array = cnpy::npz_load(array_path, "arr_0");
// std::vector like python list (3, 4, 5)
auto shape = array.shape;
// pointer to 1D array of raw data
auto array_data = array.data<T>();
There’re few important things to note here. One is that TensorFlow has weights matrix of dense layer transposed in memory. That’s why you need to transpose it again if you plan to use it in more “common” way (of dot product with input vector).
auto input_flatten_size = shape[0];
auto output_size = shape[1];

const size_t size = input_flatten_size*output_size;
std::vector<float> transpose(size, 0.f);

int height = input_flatten_size, width = output_size;
// `tf.dense` behaves by contracting last index of input tensor with first index of weights tensor
// so saved tensor is actually a transpose matrix of shape (inputs_n, outputs_n, 1)
// do reverse transpose in memory
for (int n = 0; n < size; n++) {
    int i = n / height;
    int j = n % height;
    transpose[n] = array_data[width*j + i];
}
Another is that it’s tricky to read convolution layer properly: there’re too many indices for 1D array so you should be careful with them.
auto index = 0;
for (auto height = 0; height < filter_height; height++) {
    for (auto width = 0; width < filter_width; width++) {
        for (auto depth = 0; depth < input_depth; depth++) {
            for (auto filter = 0; filter < filters_number; filter++) {
                weights_(filter, height, width, depth) = array_data[index++];
            }
        }
    }
}
Step 3. Inference
It’s relatively easy to implement a fully-connected layer as trivial operation with dot product of matrix and vector. A little bit more effort is required for convolution layer but feedforward() part is quite simple anyways. Recently I started an educational project that will help to understand how to do that. yannpp library - a small C++ only implementation of deep neural network (capable both of learning and inference). Code is relatively simple and heavily documented so it should be easy to start and use it or create a better library.
With yannpp you can precreate a model in C++ and it’s ready for use. Here you can see an example for VGG-16 model:
using cnn_t = convolution_layer_2d_t<float>;
using fc_t = fully_connected_layer_t<float>;
using pl_t = pooling_layer_t<float>;
using m_t = layer_metadata_t;

layers_list layers = {
/* ############## CONVOLUTION LAYER 1 ################# */
  std::make_shared<cnn_t>(
    shape3d_t(56, 56, 3), // input
    shape3d_t(3, 3, 3), // filter
    64, // filters count
    1, // stride
    padding_type::same,
    relu_activator,
    m_t{ "conv1_1" }),
  std::make_shared<cnn_t>(
    shape3d_t(56, 56, 64), // input
    shape3d_t(3, 3, 64), // filter
    64, // filters count
    1, // stride
    padding_type::same,
    relu_activator,
    m_t{ "conv1_2" }),
  std::make_shared<pl_t>(
    2, // window
    2, // stride
    m_t{ "pool1" }),
/* ############## CONVOLUTION LAYER 2 ################# */
....
};

yannpp::network2_t<float> network(layers);
auto input = read_image(testsDir + "/test_4.JPEG");
auto output = network.feedforward(input);
The most sensible way to use such library is to statically link it or just include all files in your project. Resulting overhead size of your executable will be only a couple of kilobytes even including cnpy library for reading .npz archives.
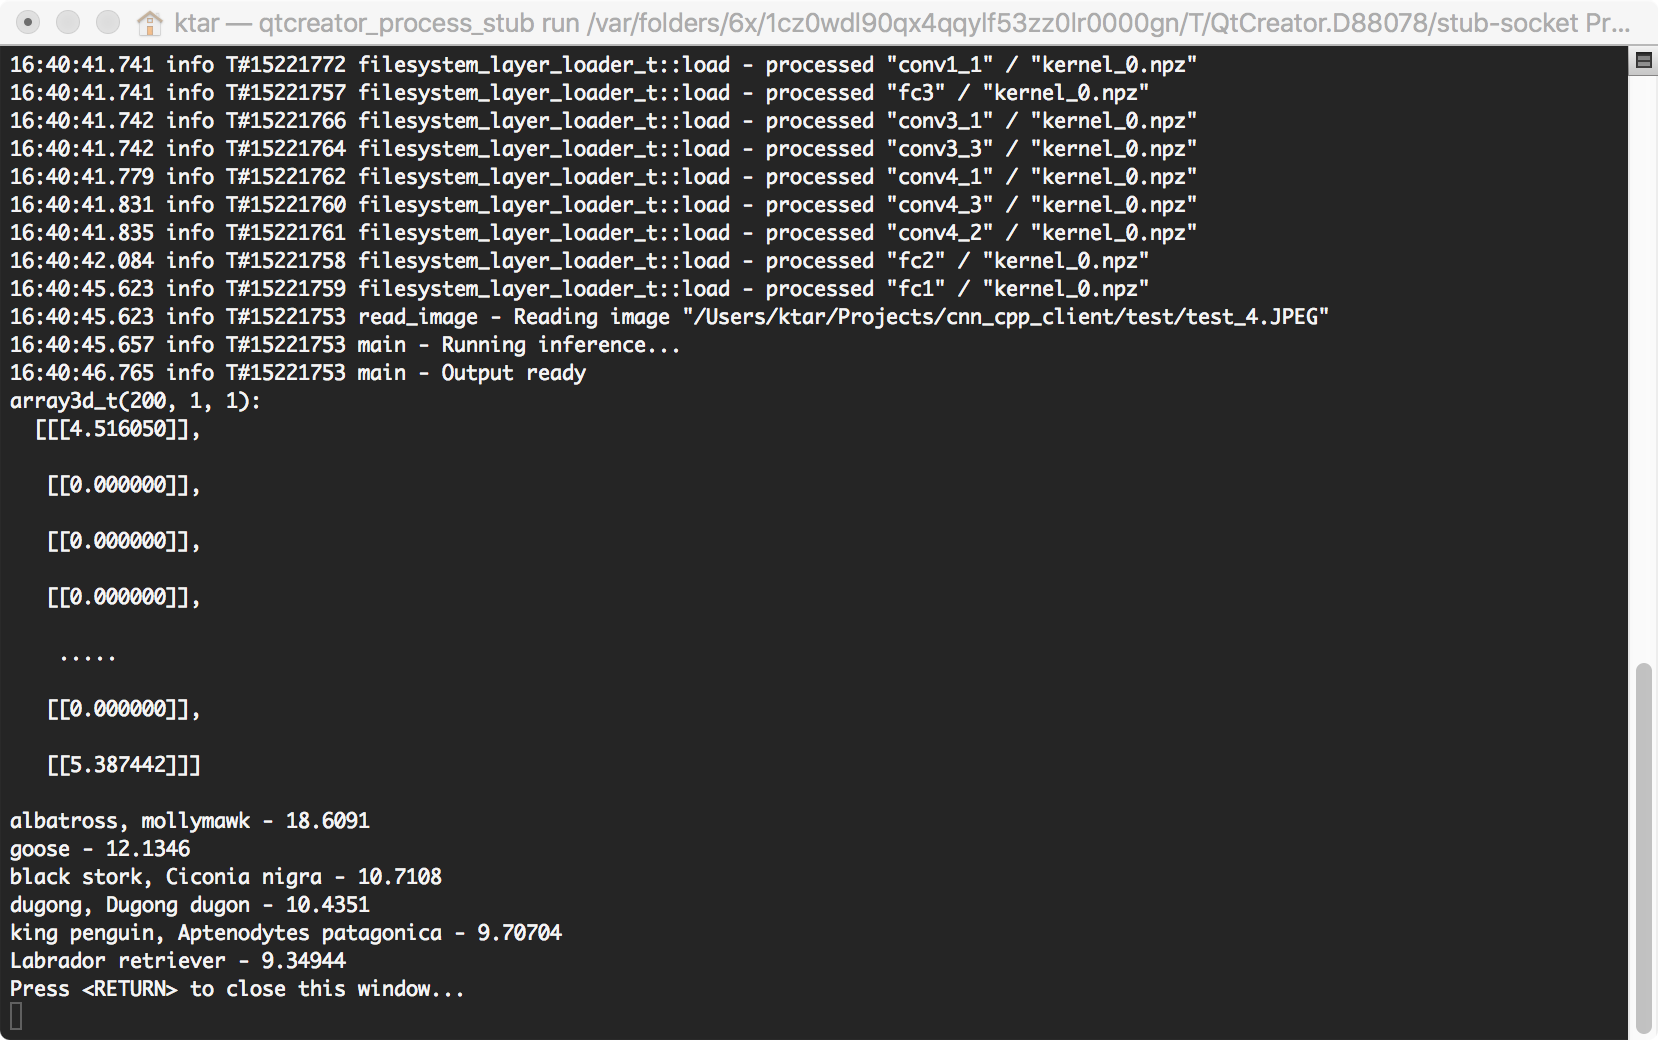 Example of inference of VGG-16 model
Performance of this tiny inference engine is not that bad, although it can be heavily optimized by using vectorized operations for dot products.
Conclusion
There are couple of options to run inference for TensorFlow-trained models. However, if you’re after reducing size of your deployed application you would need to have something tailored right for you. The best you can have is custom inference code and as you can see from this post it is not so hard to achieve.
Full code of VGG-16 export, load and inference can be found in this awesome repository.
I would be really happy to read in the comments how do you run inference on consumer devices.